| Source |
| |
| Source |
I've been wanting to do this project ever since we moved into our new rental, back at the end of February. I had a hard time deciding which wall I was going to use but ended up going with the wall in our living room to add some extra color to the space. Even though it is broken up by a window I felt that that picture ledges would be the perfect spot.
I got inspiration from here and here as they were some of the most frequently pinned posts. And here is how I did it for a little less than $10 per picture ledge.
Supplies:
Wood in the length you need for your wall (I cut mine to 3 feet each)
Rounded trim (find it in the trim section at your hardware store)
L brackets
Screws
Finishing nails or nail gun
Paint
Wood glue
Drill
Steps:
1. Decide the length you want your ledges to be then using a sawzall or circular saw cut them, or you can have the nice employees at your local hardware store do this for you. Cut your rounded trim to the same lengths as your ledges.
 |
| The wood I used for the base of the picture ledges |
 |
| I cut mine in 4 three foot pieces |
3. Apply wood glue to the rounded trim then use finishing nails or a nail gun to secure the edge.
 |
| I used wood glue I had on hand |
 |
| Working from one end to the other, I positioned the rounded trim so it laid flush with my ledge base. |
I didn't think to take a picture of this step but I just used paint I had on hand and a regular brush. I did two coats.
4. Using a level and a straight edge draw a line where you want your shelf positioned
5. Find your studs then pre-drill holes into your ledges to line up with the studs. Then you can screw your L brackets into the ledges.
 |
| My ledges after I painted them and pre-drilled holes |
 |
| After attaching the brackets to the ledge |
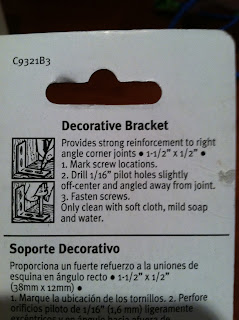
I attached them exactly as the directions on the packaging stated.
6. Line up your ledges to the wall (your brackets should already be lined up to your studs). If you live in an old house or apartment like mine your walls may be a bit uneven from settling. That's okay, once the ledges are hung you can use light pressure to bend the brackets slightly to be level for your pictures.
7. Place your pictures to cover the brackets and you're done. I hung a few and stacked the rest.
And here is the finished product!
 |
| DIY Picture Ledge |
The ledges took about 2 hours to assemble and paint and an hour to hang, not bad for about $35 bucks. Now I just need to make my curtains and hang them up and this wall will be complete (oh, and replace that light bulb-ha!)


No comments:
Post a Comment